Basics of After effects
After Effects is the best tool for motion graphics designers, video content creators, and video marketers, you can use it for simple tasks like adding a title or creating simple animations and for more complex work like making motion graphics and compositing, but working with After Effects may be complicated for those who have never used it. This article will teach you the basics of After Effects.
Adobe After Effects

AE it’s a visual effects motion graphics and compositing software. It’s used by many filmmakers in post-production when producing film tv shows or web videos, but there are some differences between premiere pro or final cut and After Effects. Compare some most common tools here.
Most motion designers try to use it for subjects, lower thirds, or opening title sequences. We are creating a lower third and animating an object. We’ll use these as examples for this post.
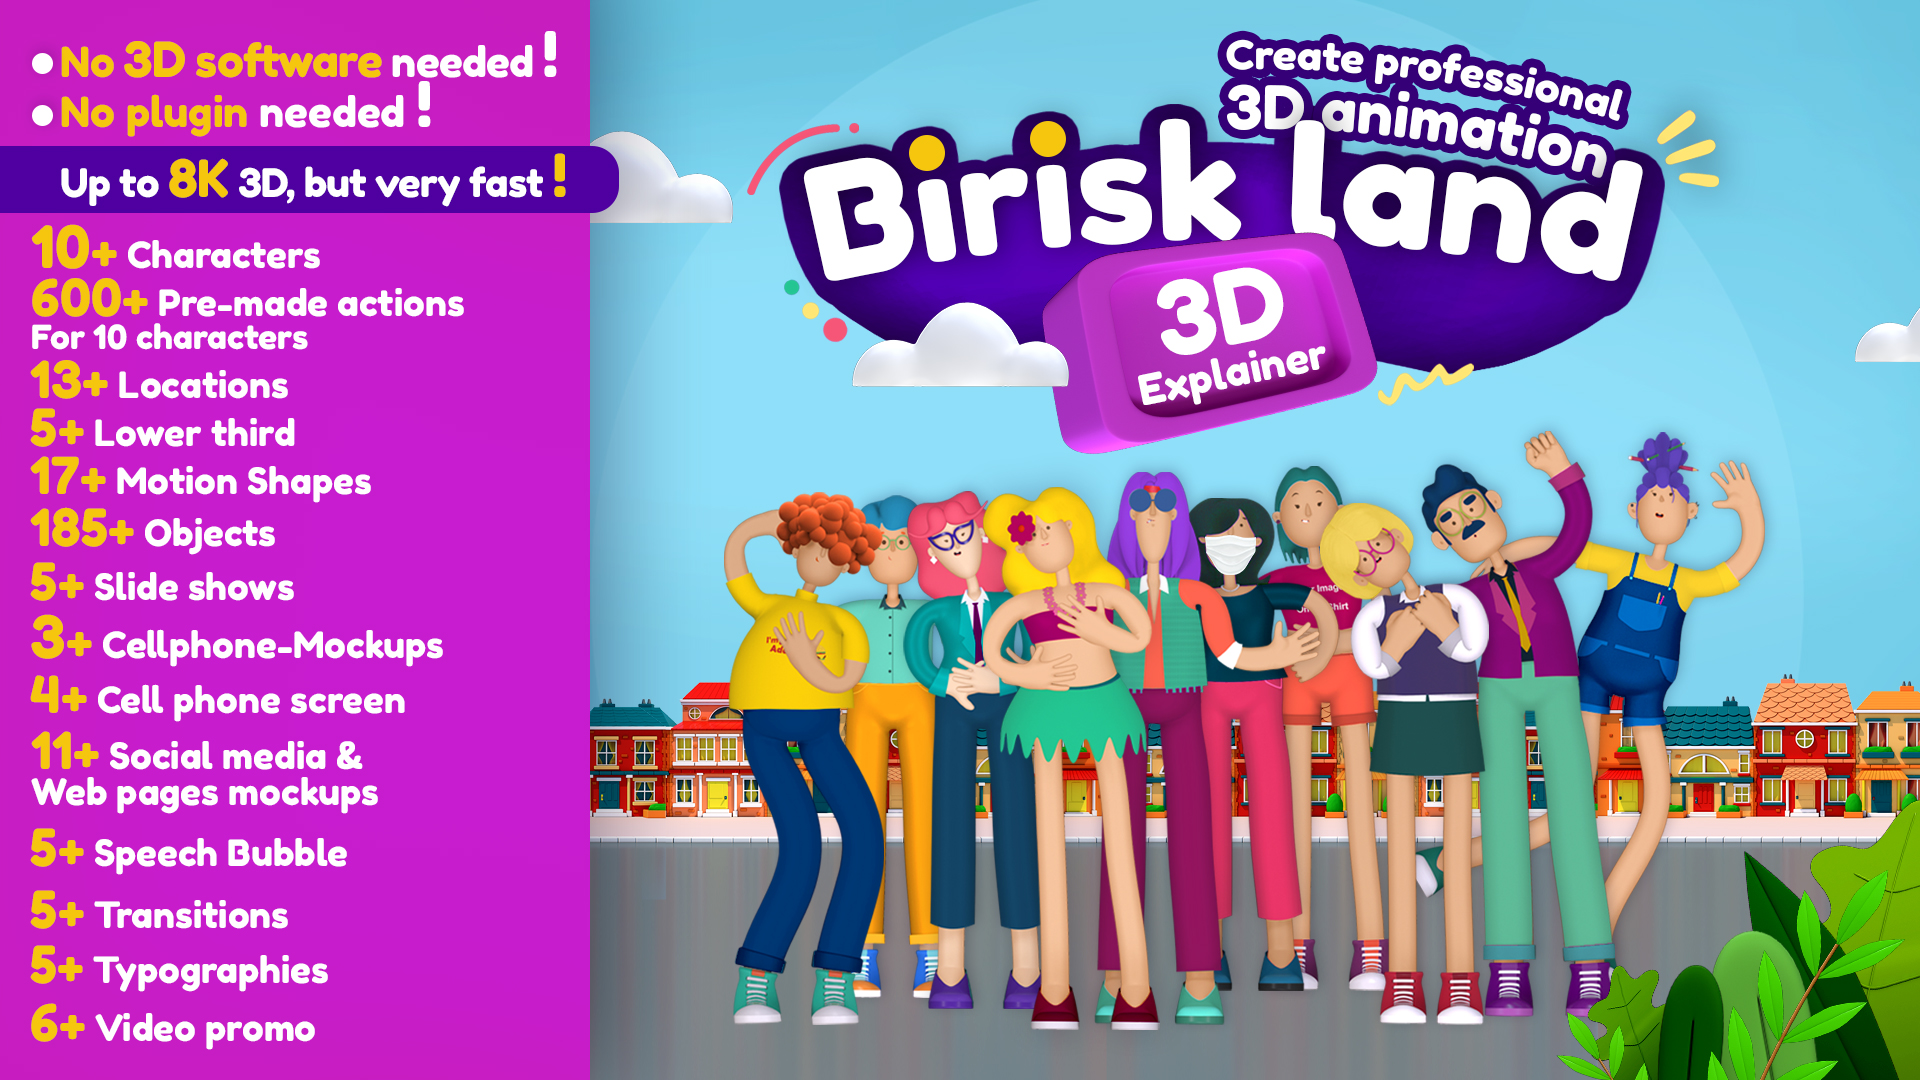
After effects templates
Templates are pre-made Ae. Projects that let you create professional motion graphics easily. Also, using them is a shortcut to learning advanced tricks faster. Read more about templates.
How To Install After Effects?
At first, you need to install After Effects. You can find it on Adobe’s website.
If it’s our first time, we must open a recent project or create a new one.
These are the steps to getting started:
- Create a new project in After Effects on File/ New/ New Projects
- Then select File > New Composition and choose a name for our Composition.
Create A Composition In After Effects
Our Composition in After Effects is as same as a sequence in Premiere. It is where we’ll create the visuals for our projects. For creating a new composition, click on ‘New Composition’ on the main page, and we’ll be guided to choose video options.

We will match the resolution, aspect ratio, and frame rate to the video for which we’ll make the graphics. When our project is not being designed for a video, we keep the options as default. Full HD resolution, standard resolution, 23.99 FPS, and four seconds for duration.
Importing Footage
We can import files in our project as the footage items, use these sources for layers and work with the items in the main panel. We can import different types of files and multiple files as sources for individual footage items. It also could be videos, still-image, and audio. When we import any files to After Effects, it doesn’t insert any data itself into our project but creates a reference link to the item’s source.

After Effects Supported import formats
- Audio: MP3,AIF,WAV,…
- Still-image: PDF,JPEG,PSD,GIF,…
- Videos & Animation: GIF,FLV,WAV,WMVMP4,…
Arrange Layers In After Effects Composition
The vertical arrangement of layers in the Timeline panel is the layer stacking order, which is related to the render order. We can change the order in which layers are composed with another.
- In the panel, drag the layer names to a different position in the layer stacking order.
- Move the selected layers up one level, press Ctrl+Alt+Up Arrow (Windows) or Cmnd+Option+Up Arrow (MacOS); Move the selected layers down one level, press Ctrl+Alt+Down Arrow (Windows) or Cmnd+Option+Down Arrow (Mac OS).
- Moving the selected layers to the top, press Ctrl+Alt+Shift+Up Arrow (Windows) or Cmnd+Option+Shift+Up Arrow (MacOS); Moving the selected layers to the bottom, press Ctrl+Alt+Shift+Down Arrow (Windows) or Cmnd+Option+Shift+Down Arrow (Mac OS).
- By choosing Layer > Arrange, and then choose to Bring Layer Forward, Send Layer Backward, Bring Layer To Front, or Send Layer To Back.
Set Transforms (Position, rotation, and scale)

- Anchor Point: It can adjust a new position of the point inside.
- Position: We have X, and Y axis to transform an object.
- Scale: We can insert numbers to make an object bigger or smaller.
- Rotation: Rotate 360 degrees to cycle or set a number to adjust it on an object.
- Opacity: Start from completely blurred at 100% to utterly transparent at 0%. A higher value makes our layer blur, and a smaller value makes our layer more transparent.
Playback In The Timeline
On the right of the layers section, we’ll see the timeline option. The bar above our timeline will display when it has rendered enough to run smoothly. If the bar isn’t ready, we have two ways to go to see our animation.
We can choose a lower resolution playback to ease the load and let After Effects render the preview faster. Also, we can press space to start playback, rendering each frame one by one.
After Effects Keyframes & Parameters
Keyframes and parameters are the most critical aspects of the power of After Effects.
- Keyframe signs the begging points and endpoints for actions in our animation.
- A parameter is the value of the objects, files, and layers we can set with keyframes.

Animate Layers
- Choose the layer we need to animate.
- Select the parameter we need to adjust.
- Move the play head in the timeline to the place we need to keyframe to show.
- Click the stopwatch icon on the left of the parameter to build a keyframe on the timeline.
- To build another keyframe, scroll down to the wanted endpoint of the motion, set the parameter to the wanted position, and a 2nd keyframe will be made.
Add Effects To The Layers
- AUDIO
If we want to edit custom parameters of our audio parts and don’t want to open other software,
We can go to Effect > Audio and choose a new setting. Then, we have a much more comprehensive range of tools than volume control.

- COLOR CORRECTION > LUMETRI COLOR
Lumetri Color gives us a great control panel to fine-tune and acquire the color in our projects, such as Exposure, Vibrance, Saturation, and Levels. It also has built-in color filters. Go to the control panel and then Creative > Look.
TRANSITION > CC SCALE WIPE
The CC Scale Wipe is a great tool to set the direction, stretch amount, and set the axis to the center for better looks.
Select the layer and then Effect > Transition > CC Scale Wipe.
Create Shapes & Paths In After Effects
A Shape Layer is a layer including a Shape. When we talk specifically about an After Effects Shape Layer, we’re talking about the shape that After Effects creates.
We can adjust graphics and image parameters in PNG form or import Photoshop and Illustrator files into After Effects. What sets a Shape Layer apart is the capability to create it within After Effects, using a range of Transform settings, like animating the Shape Path.
After Effects Interpolation & Graph Editor
Interpolation is how the program will find the values of two points. It means it is how After Effects displays how the parameters we’re animating actions between two keyframes. Click on the graph icon at the bottom of the Layers panel to select GraphEditor.
Nesting Compositions
One of the best aspects of After Effects is how we can use compositions in other compositions. Necessary, if we have an animation made and need to customize that Composition as a layer through our greater Composition, we can do that easily by going to the Project panel on the top left and dragging new compositions to our Layers panel.
Masking
A mask lets us control the visibility of a specific layer, typically by making a shape or specific cutout. It is helpful because it lets us cut out layers, combine different parameters, and build unique transitions.
To build a mask, right-click the layer, select the mask, and then the new mask. A new drop-down layer below the base layer will be displayed. For using the mask to create the txt animate in, adjust keyframes as before, but this time we’ll be moving the mask, and the txt stays the same.
After Effects Render Settings
At the begging, we want to click on ‘Best Settings. A window will pop up where we can double-check to see whether all of our settings are where we want them to be for our export or not.
How to Export Your Project
If we’ve made it so far, we hope we’ve picked up the basics of changing up our motion graphics with After Effects.
We’ll need to insert our Composition into the render queue. Go to File, Export, Insert to Render Queue, or hit CTRL M on a PC or Command on a mac/os.